At made by loop we’re big fans of saving time and effort when it comes to After Effects, so here’s 8 different ways to save yourself time and improve your workflow in After Effects:
1. Use folders in the project panel
Using folders in the project panel is an absolute timesaver, not just for yourself, but for any motion designer who inherits your project after you.
Without folders, you end up with a big long list of files and precomps in your project panel which makes it very difficult to actually find anything. It’s the After Effects equivalent of keeping all your files on your desktop… and if you still do that then stop reading this right now and go tidy up those files!
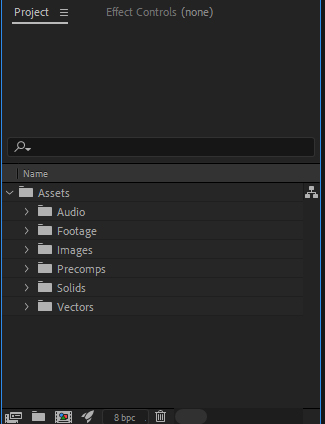
Instead, choose a clear folder structure and categorise your files, footage, and precomps - something like this should work:
Setting up this folder structure can be a hassle for each new project, but luckily the next tip sorts that problem for you:
2. Use a new project template
Let’s say you’ve set up an After Effects project with the folder structure from tip 1, and let’s also imagine that you’ve created a blank composition too.
Now, instead of setting this up every time you create a new project in After Effects, what you can do is actually tell After Effects to use this template for every new project you create.
To do this, once you have your folder structure set up for the first time, click: File > Save As > Save As
Then choose “Adobe After Effects Template Project” from the Save as Type drop down.
Save your template in a sensible location.
Then you need to tell After Effects to use this template for every new project. To do this, go to: Edit > Preferences > New Project
Check the box that says New project loads template and then press the Choose Project Template button and find the template file you just saved and click OK.
Now whenever you create a new project in After Effects you’ll have your super organised folder structure and a blank composition waiting for you ready to go.
You can see this in action here:
Naming files and folders is a vital process for any motion designer, and it’s something that’s covered more in chapter 4 of the Freelance business upgrade course.
3. Name your layers
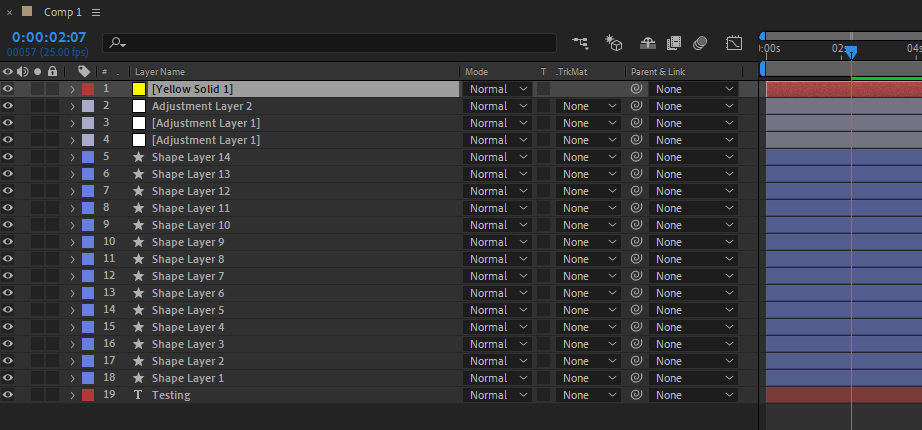
This is a big one. I can’t tell you how many old projects I’ve opened to see 100+ layers with names like: Shape Layer 52, Null 10, Yellow Solid, Adjustment Layer 3
I get it, you’re in the zone of animation and nobody has time for naming layers, but trust me a little time now will save you a lot of time later.
It doesn’t have to be complex at all, just something high level will do. Take adjustment layers for example, if you have an adjustment layer that adds blur to your project, then label it “Blur Settings” - that way if you have more than one adjustment layer you know exactly which one has the settings you need.
Using a shape layer as a matte or a background? Add the words MATTE or BG to it. It’s such a simple thing but again, it will save you so much time further down the line.
4. Create After Effects Presets
Presets are a great way to speed up your motion design workflow, and they’re incredibly simple to set up.
Let’s say you’ve created a text animator for a project that you’ll need to use throughout an animation. Instead of copying and pasting the animation from layer to layer, you can instead create a new preset and apply this to any future layers you create.
To create a new preset, all you have to do is select the effects or animators on your layer and click Animation > Save Animation Preset
Give the preset a useful name that describes what the preset is, if it’s a bouncy text animation then you can call it “Bouncy Text” for example.
Then you need to save it in the right location, if you’re on a mac the location is:
Documents/Adobe/After Effects CC (VERSION NUMBER)/User Presets/
If you’re on windows the location is:
/Documents/Adobe/After Effects CC (VERSION NUMBER)/User Presets
If you save it anywhere else After Effects will let you know that it’s not in the right location.
Once you’ve saved your preset in the right folder, it should then appear in the Effects & Presets panel. You can then drag and drop this preset onto any of your new text layers and you’ll have the same animation all set up for you.
If your preset isn’t appearing in the panel, read this guide on how to install an after effects preset.
You can also buy and download presets from others too! This is a great option if you’re trying to recreate a particular look or effect, check out our After Effects presets for a sample of the type of presets you can download.
5. Use After Effects Scripts
After Effects scripts can be massive time savers. Pretty much all of the made by loop scripts are designed to save you time and effort in your workflow.
After Effects scripts are basically little bits of code that automate complex or repetitive tasks for you.
For example, the Focal script streamlines the camera lens blur effect in After Effects - with the click of a button the script creates a new adjustment layer, applies the camera lens blur effect, creates a new blur map, applies the blur map to the effect, and it even adds some handy little controllers so that you can tweak the blur map in a much more visual way.
To do all this manually takes time and effort every time you want to set up a new camera lens blur. By using a script, all the hard work is automated for you.
There’s so many scripts out there that can take the hassle out of various tasks in After Effects, have a browse through the loop After Effects scripts or check out aescripts for more.
6. Use Increment and Save
Have you ever had a client request a change to an animation only for them to turn round and ask for that change to be completely reversed?
If so, then it’s always handy to have a previous version of your project file available so that you can easily revert any changes you’ve made.
This is where the After Effects increment and save option comes in.
Before starting work on a new feature for the client, choose File > Increment and save - this does exactly what it says it will do. It saves a new version of your project file and increments it by 1.
(So this means that if you’re working in My Project File 1, your active project would become My Project File 2 - the old file still exists, which means you can return back to it later)
Make this part of your standard workflow, some motion designers choose to increment their project files every day so that they have different versions to go back to. Others increment their projects every time a new feature is worked on, or a new feedback request comes in.
The other added bonus of this is that you end up with multiple versions to revert back to if something happens to your latest file. Let’s say your working file becomes corrupted, you can go back to a previous version and instead of losing a week’s work, you may only lose a couple of hours.
7. Learn & use shortcuts
Shortcuts are an absolute must for the pro after effects user, they save so much time and can do things that you may not even realise.
My personal favourite and one I use all the time is: Ctrl + Alt + Home - this places the anchorpoint of your layer right in the center. A massive time saver.
There’s also Ctrl + W which will close the window you’re currently in, super useful for quickly closing all those precomp tabs that seem to accumulate. Ctrl+Shift+W will close ALL the tabs too which is a real time saver.
Check out these resources for more shortcut goodness:
- Adobe Help - Preset and customisable keyboard shortcuts
- 30 Essential Keyboard Shortcuts - School of Motion
8. Create render settings templates
Rendering takes enough time as it is, so to help speed things up you should absolutely be making use of render settings templates, especially if you’re constantly choosing the same options from the Render Settings, Output Module, or Output To options in the render queue.
Let’s say that whenever you add something to the render queue you always change the output module settings in this window:
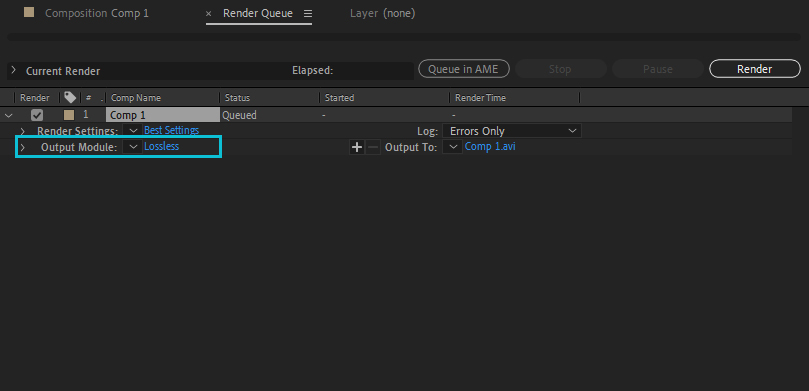
Well, once you’ve changed your settings before you click render click the down arrow next to the blue link and choose Make Template…
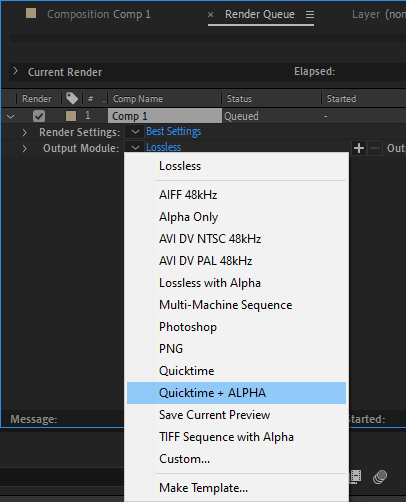
Give it a descriptive name, let’s say you use the Quicktime output module with Alpha you could set the name to Quicktime + ALPHA - or something descriptive.
That way, the next time you come to render a composition out, instead of changing all the settings like you would usually do, all you have to do is click the down arrow and choose your template:
Then all the settings will be applied for you.
There are some standard templates already set up for you which can be quite useful, in the down arrow of the render settings option for example there’s a “Draft Settings” option that will output your animation at half resolution instead of full.
And there we have it! 8 super simple ways to save time in After Effects
Have any workflow improving tips of your own?
Get in touch on Twitter to let us know.
