After Effects presets are a great way to save time in your motion graphics workflow. If you constantly find yourself applying the same effects, or animation, with the same settings and values, over and over again, then you should definitely start to create presets in after effects.
So here’s how to create a preset in After Effects:
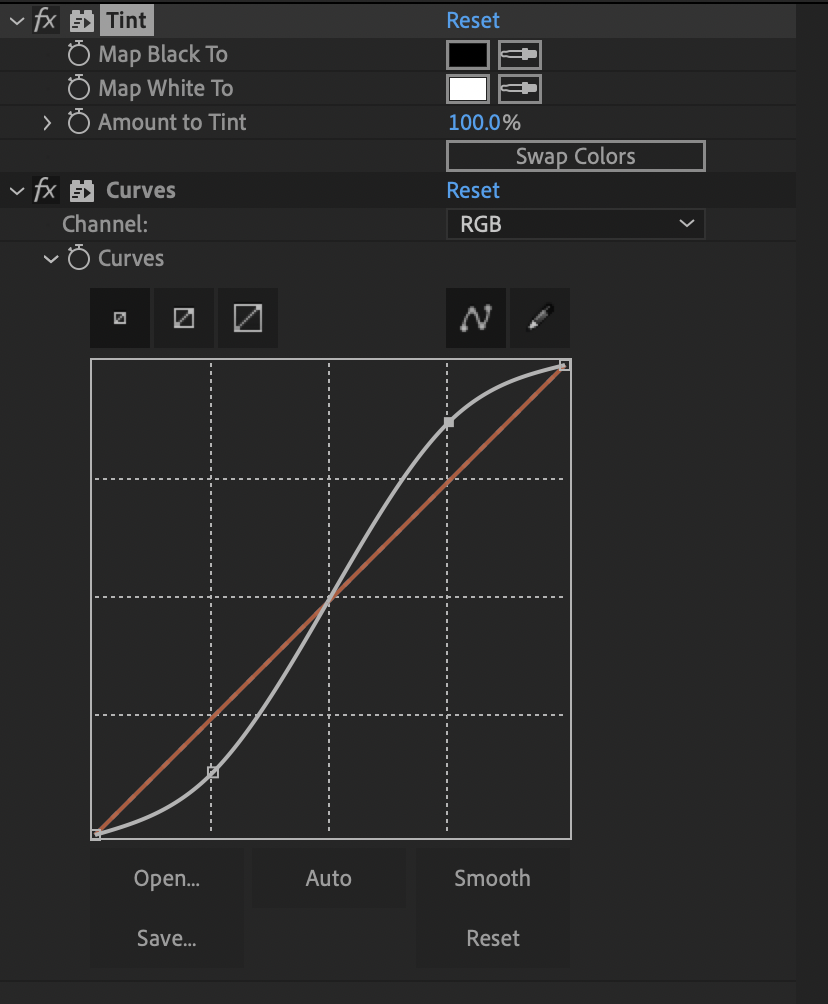
In this example we’re going to create a preset that will apply the Tint effect and also a Curves effect that has a contrast curve already created like so:

It’s worth noting here that a preset can be created using any number of effects. Presets can also be created from keyframes you’ve applied to your layers as well which makes them incredibly flexible.
Step 1. Create your animation or effects
The first step then, is to add our effects to a layer or adjustment layer. So for this example, we’d add the tint effect and then add the curves effect as shown in the picture above.
Step 2. Select the effects or animation you want to add to the preset
Now we need to select the various effects or animation that we want to include in our preset. For this example, we’ll make sure the Tint effect and the Curves effect are highlighted in the Effect controls panel.
Step 3. Create the preset
To actually create the preset, with everything selected, choose Animation > Save Animation Preset from the menu.
This will open up a save window for you to create the preset. By default this should be the User Preset folder for the version of After Effects you’re using, but it might not be! So it’s important to check you save your preset in the correct place.
Make sure you’re saving the preset in the following location (depending on your operating system):
For Mac users, the After Effects user presets folder is located here:
/Documents/Adobe/After Effects CC (VERSION NUMBER)/User Presets/
For Windows users, the After Effects user presets folder is located in the same folder structure (you may need to change Documents for My Documents depending on your version of Windows):
/Documents/Adobe/After Effects CC (VERSION NUMBER)/User Presets
NOTE: replace (VERSION NUMBER) with the version of After Effects you are currently using, so if you’re still using After Effects CC 2019 for example then the file path would look something like this:
/Documents/Adobe/After Effects CC 2019/User Presets
Now that the preset has been saved, it should appear in the Effects & Preset panel.
Try searching the Effects & Preset panel to see if your preset comes up, if it does: congratulations! You’ve just created a preset in After Effects and you can now apply it every time you need to replicate the tint/curves effect (or whatever effects/animation you saved).
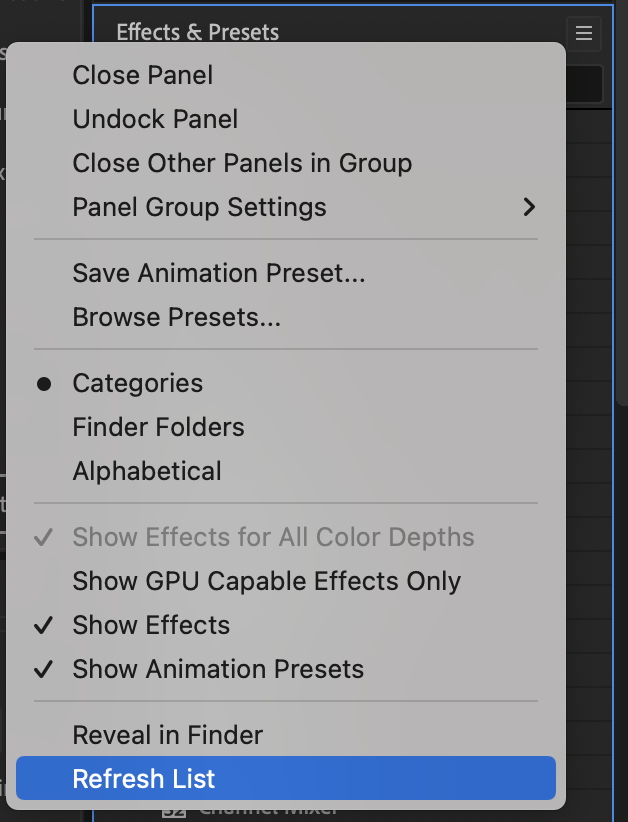
If the preset doesn’t show up, you may need to refresh the effects & preset panel. To do this, click the three lines in the top right hand corner of the effects & preset panel to bring up the panel’s menu.
Then right at the bottom choose: Refresh List

Once you’ve refreshed the list, try searching for your preset name again and it should show up.
If you can’t see your preset, chances are you haven’t saved it in the correct place. The most common issue is that the preset is saved in the wrong version of after effects. Double check it’s in the correct folder and perhaps try restarting after effects to make sure.
If your preset still doesn’t appear, try reading this article on how to install an after effects preset which has more information on the correct place to put them.
And there we have it! That’s how to create a preset in After Effects. The presets you create can be as simple or as complex as you need them to be.
The cool thing is, you can also download and install presets from other people too. Here at Loop we have an entire selection of After Effects Presets for you to use, so be sure to check them out.